
Pool pump running but no flow? Here's why
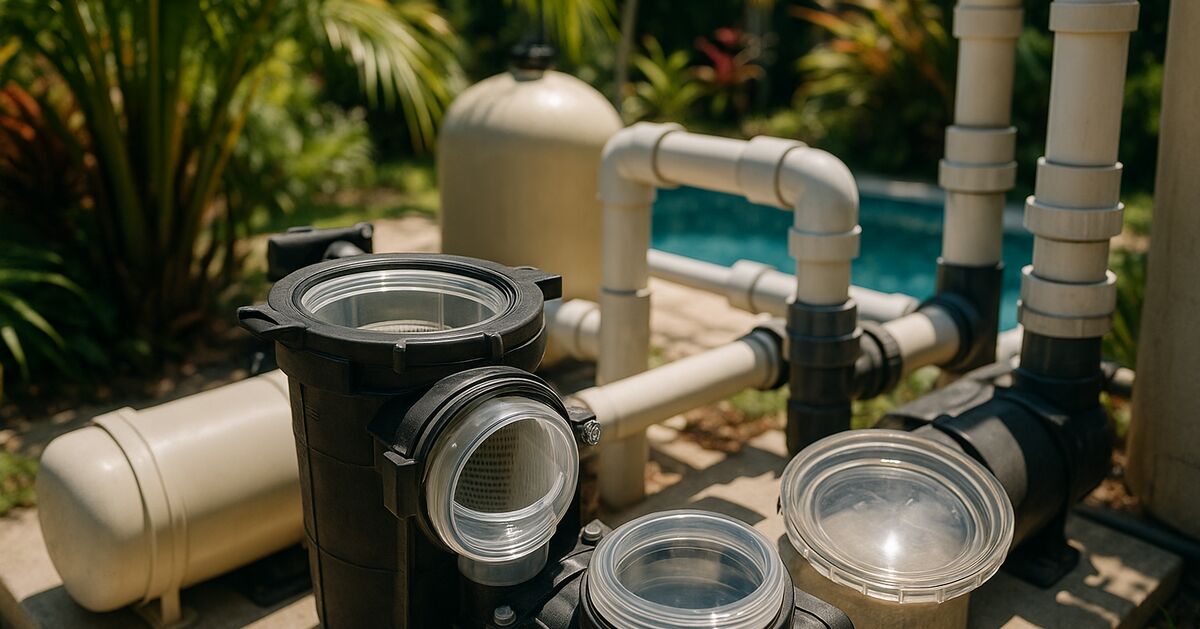
Your pump motor is humming, the timer fired on schedule, the breaker is fine - but the water is dead still and the pressure gauge looks like it gave up. This is one of the more frustrating pool problems a homeowner can run into, because the equipment sounds like it is working. The motor is doing its job. The problem lives somewhere between the water and the impeller, and on the barrier islands around Sarasota Bay and the Gulf, the coastal environment adds a few twists that make this failure more common than it would be further inland.
This guide walks through every realistic cause, in the order you should check them, with plain explanations of what is actually happening inside the plumbing and why.
Start here: what "no flow" actually means
Pool circulation works like a loop. The pump creates a low-pressure zone at its inlet that draws water through the skimmer and main drain, pushes it through the filter, heater (if you have one), and chlorinator, then returns it through the jets. Break that loop anywhere and the pump keeps spinning while nothing moves. The motor can run indefinitely under those conditions, which is why you can have a hot pump housing and zero pressure at the same time.
Recognizing the failure early matters, because a pump running without water flowing through it will overheat. The pump seal relies on water for cooling and lubrication. Run it dry long enough and the seal fails, which turns a simple diagnostic call into a parts replacement.
Check the skimmer basket first - always
The skimmer basket is the first thing in the suction path, which means it is also the first thing that stops debris from reaching the pump. In a place like Longboat Key or Anna Maria Island, where sea grape leaves, palm fronds, pine needles, and the occasional ibis feather are a fact of life, skimmer baskets can plug overnight during windy weather.
A partially clogged basket will still allow some flow - you will see reduced pressure and sluggish jets. A basket packed tight enough creates what engineers call a "starved pump" condition: the pump is pulling harder than ever, but there is nothing to pull. You may hear a rattling or gurgling at the pump housing instead of the usual smooth hum.
Remove the skimmer lid and lift the basket out. If it is more than about one-third full, clear it before doing anything else, then restart the pump and watch the pressure gauge. If it recovers to its normal range, you found the problem.
Note: in humid salt air, plastic skimmer baskets may become brittle sooner than expected, so inspect yours periodically. A basket that has developed fine cracks or missing sections can collapse inward and seal against the basket throat, producing a complete flow blockage that looks exactly like a fully packed basket from the outside. Hold yours up to the light and inspect it carefully.
The pump strainer basket: coastal gunk loves it
Six inches downstream from the skimmer basket sits the pump strainer basket, housed in the clear or semi-opaque lid on the pump itself. Its job is to catch anything the skimmer basket missed. Because it is under suction pressure, it is even more efficient at trapping debris - and even more effective at killing flow when it is clogged.
Fine algae, sand, and iron minerals from local water can form a paste that coats the basket mesh. It can look partially empty but still block most of the flow if the mesh openings are coated.
To check it: turn the pump off, release pressure if your system has a relief valve, remove the lid (counterclockwise on most residential pumps), and lift out the basket. Rinse it under a garden hose with a nozzle set to the jet pattern. If the mesh stays brownish or greenish even after rinsing, soak it in a bucket of diluted muriatic acid solution (one part acid to ten parts water, adding the acid to the water, and wearing gloves and eye protection) for 15 minutes, then rinse thoroughly. The mineral staining you are removing is the same calcium and iron buildup you see on your waterline tile - the same chemistry, just in a different location.
While the basket is out, look inside the strainer housing with a flashlight. Debris that escaped the basket - a pebble, a chunk of cracked old basket, a twist tie from a chemical bag - can wedge in the throat of the impeller housing and partially or completely block flow. Fish anything out with needle-nose pliers before replacing the basket.
The impeller: the heart of the problem
If the baskets are clear and the pump is still not moving water, the impeller is the next suspect. The impeller is a small spinning disc with curved vanes, mounted directly on the motor shaft inside the pump housing. When it spins, it flings water outward by centrifugal force, creating the suction at the inlet and the pressure at the outlet. The entire flow of your pool passes through a space about the size of a fist.
Impeller clogging
Fine debris - hair, pine needles cut to short segments, small leaves, decomposed organic matter - can slip through both baskets and pack between the impeller vanes. When this happens, the impeller is still spinning and the motor current draw is actually low (no load on the vanes), which is why the motor feels fine. The water simply has nowhere to go.
You will need to open the pump volute (the wet end of the pump) to reach the impeller. On most residential centrifugal pumps, this means removing four to eight bolts around the pump housing flange, separating the volute from the motor, and looking at the impeller face. Clogged vanes are usually obvious: you will see a matted, dark plug of debris packed tightly between the passages.
Use a small flathead screwdriver or a wooden skewer to clear each passage. Never use anything that could score the impeller surface - scratches on those vanes reduce pumping efficiency measurably. Once cleared, reassemble carefully, ensuring the O-ring at the volute joint is seated correctly and lightly lubricated with a silicone-based pool O-ring lubricant (not petroleum jelly, which degrades the rubber).
Impeller wear and erosion
Here is where coastal conditions add a unique layer of complexity. The Gulf beaches around Siesta Key, Lido Key, and Bird Key are famous for fine quartz sand. Local sand and mineral content in the water can gradually abrade impeller vanes over time. Over a few seasons, the vane edges round off. The pump motor runs the same, the current draw looks normal, but the hydraulic efficiency drops steadily. Flow becomes sluggish, then the pump struggles to prime, and eventually it appears to run with no flow even though it is technically moving water - just not enough of it.
A worn impeller can significantly reduce a pump's effective output, sometimes by half or more. If your system was designed around a specific flow rate (for a heater, a UV sanitizer, or a salt chlorine generator, all of which have minimum flow requirements), a worn impeller can cause those downstream devices to fault out, producing error codes that look like electrical problems when the real issue is mechanical.
Impeller replacement is a straightforward repair during a pump service call. The part itself is usually modest in cost; the labor involves opening the pump, removing the impeller (threaded on most residential units - lefty-loosey), and installing the new one with the O-ring properly seated. If the impeller shows heavy wear, inspect the diffuser plate and volute interior at the same time, because abrasive wear affects all three together.
Air leaks on the suction side: the sneaky one
An air leak on the suction side of the pump - between the skimmer and the pump inlet - produces symptoms that look identical to an impeller or basket problem. The pump picks up air instead of water, loses its prime, and you get little or no flow despite the motor running. You may hear a gurgling or sucking noise at the pump, and the strainer lid may show air bubbles or frothy water instead of clear water under pressure.
Common air entry points on Gulf Coast properties include:
- The pump strainer lid O-ring, which dries out and cracks in our heat and UV exposure
- The unions on either side of the pump, especially if they were last tightened by hand
- The skimmer throat, if the water level has dropped low enough that the skimmer is drawing air alongside water (keep your water level at the middle of the skimmer opening)
- Cracked PVC fittings on the suction line, particularly near the equipment pad where roots can shift pipe alignment
To find a suction-side air leak, with the pump running, move a dry rag slowly along the suction plumbing. Anywhere you feel a slight pull, or see the rag drawn toward the pipe, you have a candidate. You can also apply a small amount of shaving foam or dish soap to suspected joints - air being drawn in will pull the foam into the fitting, making the leak location obvious without needing dye or pressure equipment.
Replacing the strainer lid O-ring is a common first fix and costs very little. Keep a spare in the equipment area - they dry out and require replacement on a seasonal basis in our climate. Our pool cleaning and maintenance services include checking these O-rings and unions during every scheduled visit, which is one of the reasons routine professional service catches these problems before they become emergency calls.
When the pump won't prime at all after a repair
If you have cleared the baskets, cleared the impeller, and fixed any air leaks but the pump still will not prime, work through this short list:
- Verify the valves. A gate valve or ball valve on the suction line left in the closed position after service is a frequent cause of a pump that simply will not pull water. Check every valve between the skimmer and the pump inlet.
- Check the water level. If the pool water has dropped below the skimmer throat during a dry spell - and our summers between the June rainy season and winter can be genuinely dry on the keys - the skimmer draws air. Add water to bring the level back to mid-skimmer before trying to prime.
- Fill the strainer basket housing manually. Remove the lid, fill the strainer pot completely with water, replace the lid tightly, then start the pump. This gives the impeller a liquid head to work with and makes priming far easier.
- Inspect the check valve. If your system has a check valve on the suction line (common when the pump sits above water level, as on many elevated equipment pads on canal-front properties in Sarasota and St. Armands Key), a failed check valve flapper means water drains back into the pool every time the pump shuts off, leaving the pump dry and unable to self-prime.
What a professional visit actually includes
When you call for a no-flow diagnosis, a qualified pool technician will work through exactly the sequence above, but with a flow meter and an amp clamp rather than just visual inspection. Measuring the actual motor amperage draw tells you whether the motor is under load (impeller moving water against resistance) or running free (impeller spinning in air). Comparing measured flow rate against the pump's published performance curve tells you whether the impeller is worn or just clogged. Those two data points together usually pinpoint the problem in under 20 minutes.
For homeowners on properties where the equipment pad is exposed to direct salt air off the Gulf - a condition that affects nearly every property we service on Longboat Key - the added corrosion on pump housing bolts and PVC unions means that accessing the impeller takes more care and sometimes penetrating lubricant before bolts will break free. Forcing corroded hardware can crack the pump volute, which is an expensive mistake. Knowing when to soak a bolt versus when to cut a union and glue a new one is one of those experience-based calls that saves money in the long run.
You can read more about what routine professional maintenance covers, and what we look for on each visit, on our pool cleaning and maintenance services page, or browse frequently asked questions about service schedules and what to expect.
Preventing this in the first place
The best insurance against a no-flow event is consistent basket maintenance and a regular equipment inspection. On our barrier island properties, "consistent" means at a minimum weekly skimmer basket checks during palm seed season and after any significant wind event. During our summer rainy season, heavy downpours drive surface debris into skimmers faster than most homeowners expect - a storm that drops two inches in an afternoon can pack a skimmer basket solid.
Consider keeping a spare strainer lid O-ring, a spare skimmer basket, and a small bottle of silicone O-ring lubricant at your equipment pad. These three items cost less than a service call and can get your pump running again on a Sunday afternoon when you have guests arriving.
For a broader look at how the Gulf Coast environment affects all of your pool equipment over time, our blog has posts covering everything from salt air corrosion to filter selection for barrier-island conditions. The same coastal chemistry that makes Longboat Key and Siesta Key so beautiful is genuinely hard on mechanical equipment, and understanding why helps you make smarter maintenance decisions.
If you have worked through the steps above and still cannot get flow, or if you are not comfortable opening the pump volute, the right move is a professional diagnostic visit before the pump runs dry any longer. Reach out to us and we can usually schedule a same-day or next-day visit across our service area, from Anna Maria Island south through Longboat Key, Lido Key, Bird Key, St. Armands Key, Siesta Key, and the greater Sarasota area.
Sources & further reading
- Pool and Spa Installation and Maintenance Guidance (Pool & Hot Tub Alliance (PHTA))
Claim-by-claim audit (8 checked)
- “Recognizing the failure early matters, because a pump running without water flowing through it will overheat.” (reasoning shown in the article)
- “Note: in humid salt air, plastic skimmer baskets may become brittle sooner than expected, so inspect yours periodically.” (rewritten to what the article can stand behind)
- “Fine algae, sand, and iron minerals from local water can form a paste that coats the basket mesh.” (rewritten to what the article can stand behind)
- “Never use anything that could score the impeller surface - scratches on those vanes reduce pumping efficiency measurably.” (reasoning shown in the article)
- “Local sand and mineral content in the water can gradually abrade impeller vanes over time.” (rewritten to what the article can stand behind)
- “A worn impeller can significantly reduce a pump's effective output, sometimes by half or more.” (rewritten to what the article can stand behind)
- “If your system was designed around a specific flow rate (for a heater, a UV sanitizer, or a salt chlorine generator, all of which have minimum flow requirements), a worn impeller c…” (reasoning shown in the article)
- “Forcing corroded hardware can crack the pump volute, which is an expensive mistake.” (reasoning shown in the article)